SpringCloud资料教程
一、是什么?
官方定义
Spring Cloud 是一系列框架的有序集合。它利用Spring Boot的开发便利性巧妙地简化了分布式系统基础设施的开发,如服务发现注册、配置中心、消息总线、负载均衡、断路器、数据监控等,都可以用Spring Boot的开发风格做到一键启动和部署。
Spring Cloud并没有重复制造轮子,它只是将各家公司开发的比较成熟、经得起实际考验的服务框架组合起来,通过Spring Boot风格进行再封装屏蔽掉了复杂的配置和实现原理,最终给开发者留出了一套简单易懂、易部署和易维护的分布式系统开发工具包。
个人理解
Spring Cloud 本身不开发项目,只做项目的管理者。
二、有什么用?
Distributed/versioned configuration 分布式/版本控制配置
Service registration and discovery 服务注册与发现
Routing 路由
Service-to-service calls 服务到服务的调用
Load balancing 负载均衡配置
Circuit Breakers 断路器
Distributed messaging 分布式消息管理
三、实现原理
架构示意图
Spring Cloud architecture highlights
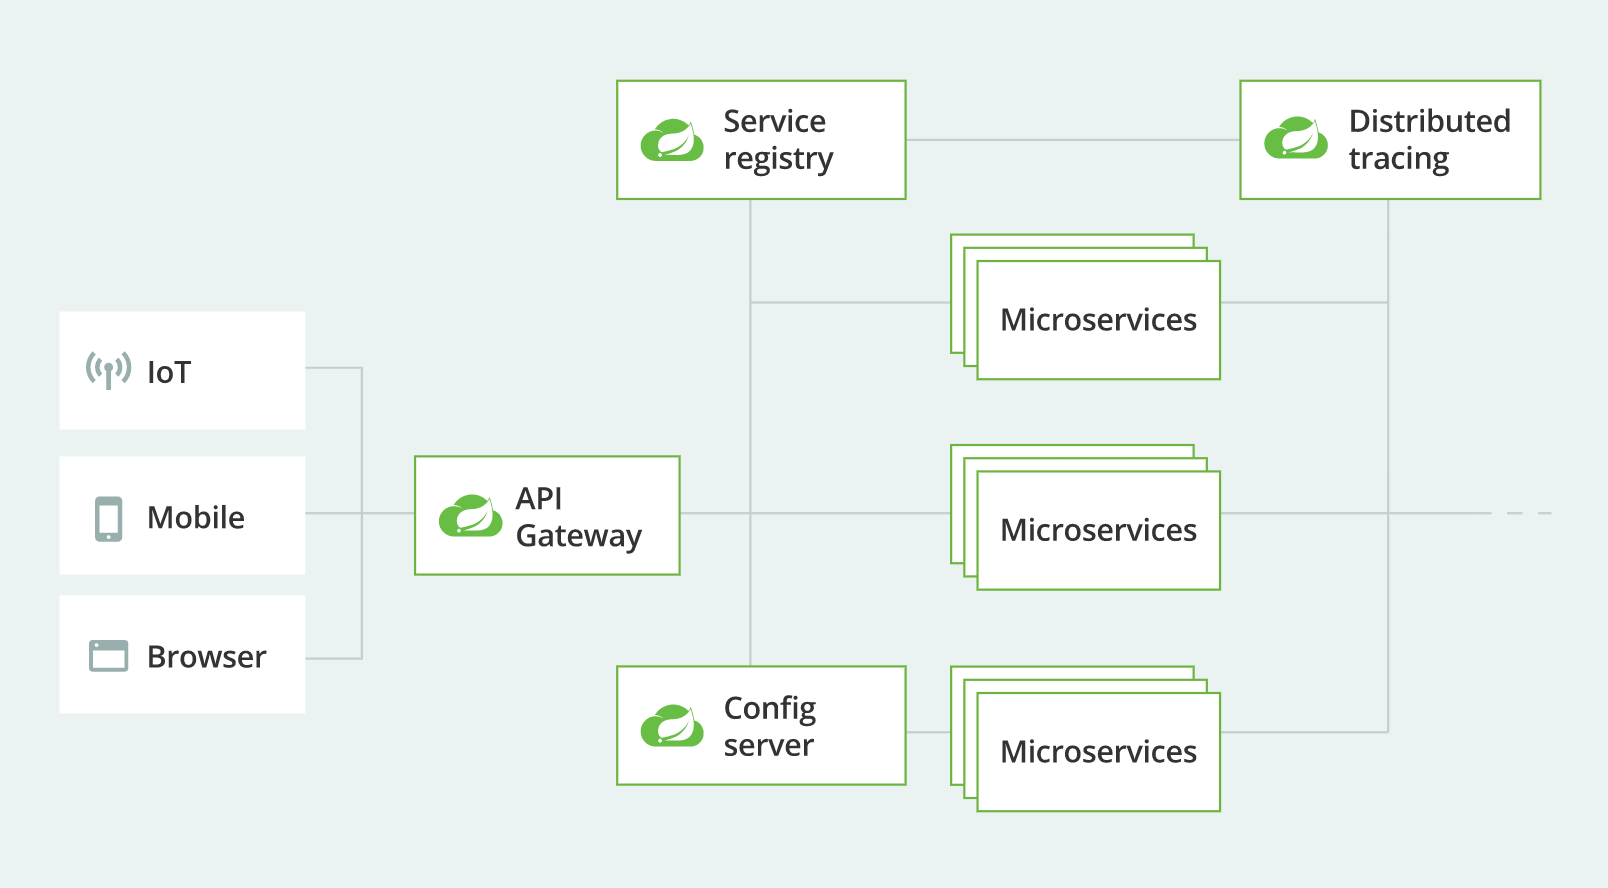
各大功能组件

注册中心
Eureka
Zookeeper
Consul
Nacos
负载均衡的服务调用
Ribbon
LoadBalancer
声明式服务调用
Feign
OpenFeign
基于 Ribbon 和 Hystrix 的声明式服务调用。
服务熔断降级
Hystrix
Resilience4j
Sentinel
服务网关
Zuul
Zuul2
Gateway
分布式服务配置
Config
Nacos
消息总线
Bus
Nacos
微服务应用监控
Spring Boot Admin
四、为什么选择它?有无其他更优方案?(货比三家)
SpringCloud 和 SpringBoot 的关系
SpringBoot 专注于方便的开发单个个体微服务;
SpringCloud 是关注全局的微服务协调整理治理框架,它将 SpringBoot 开发的一个个单体微服务,整合并管理起来,为各个微服务之间提供:配置管理、服务发现、断路器、路由、为代理、事件总栈、全局锁、决策竞选、分布式会话等等集成服务;
SpringBoot 可以离开 SpringCloud 独立使用,开发项目,但 SpringCloud 离不开 SpringBoot,属于依赖关系;
SpringBoot 专注于快速、方便的开发单个个体微服务,SpringCloud 关注全局的服务治理框架。
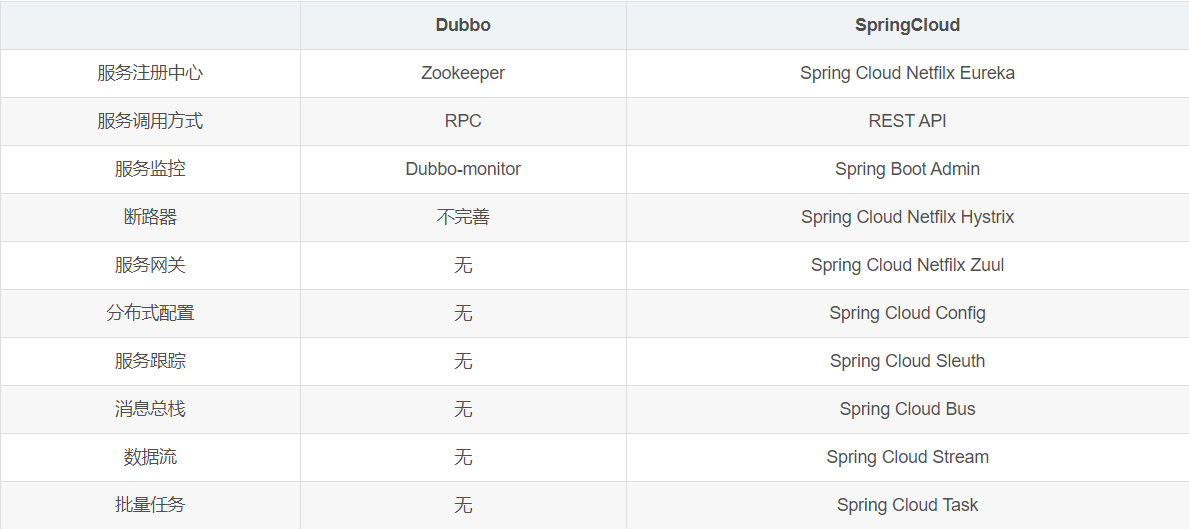
Dubbo 和 SpringCloud 技术选型
分布式+服务治理Dubbo 目前成熟的互联网架构,应用服务化拆分 + 消息中间件
Dubbo 和 SpringCloud对比 可以看一下社区活跃度:
https://github.com/dubbo
https://github.com/spring-cloud
五、怎样使用?
- SpringCloud Netflix
- SpringCloud Netflix 中文文档
- SpringCloud Alibaba
- SpringCloud 中文API文档(官方文档翻译版)
- SpringCloud中国社区
- SpringCloud中文网
- SpringCloud系列
项目及架构参考
https://github.com/macrozheng/mall-swarm

确认 SpringCloud 与 SpringBoot 的版本对应
从 官网 确认 SpringCloud 的版本信息
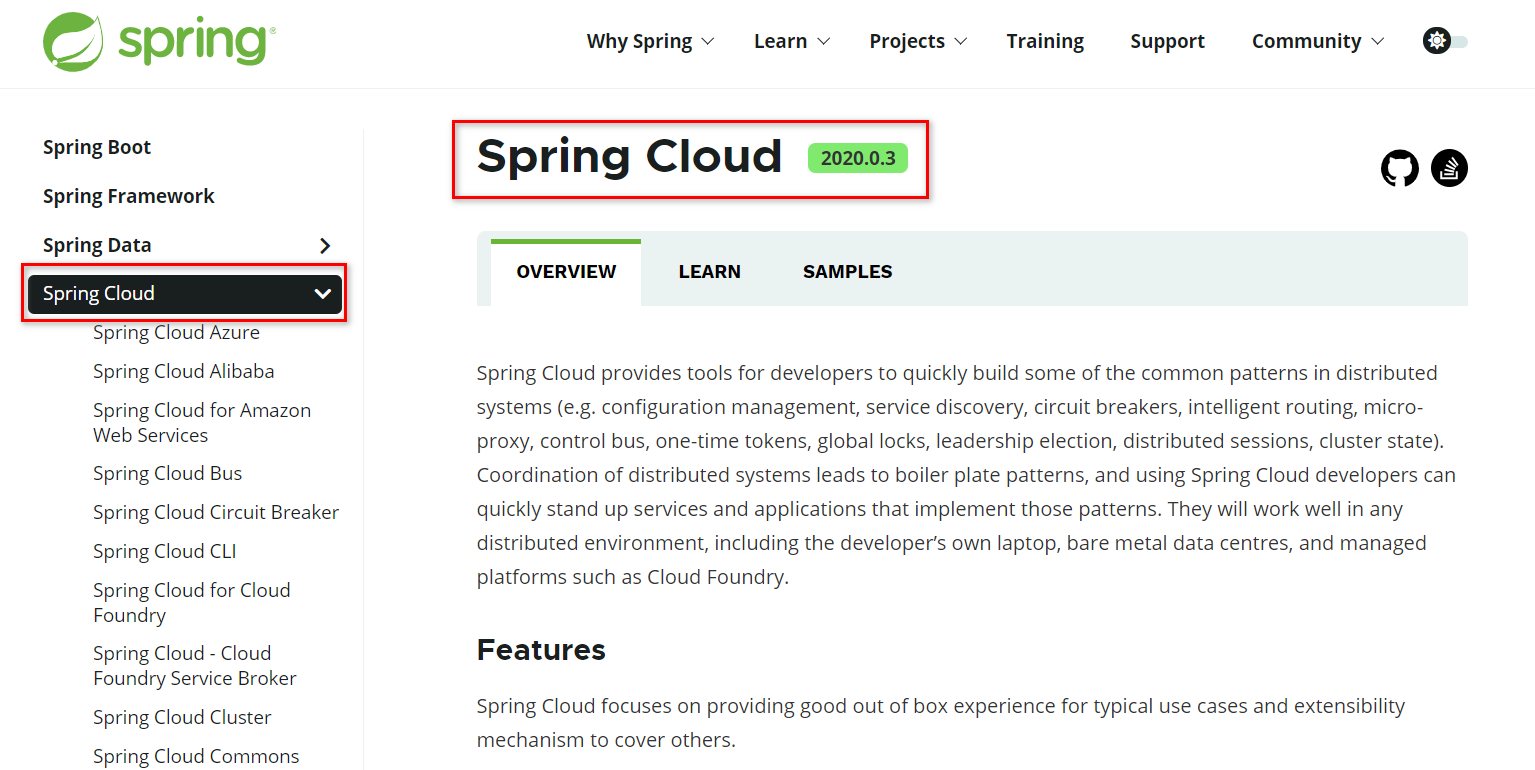
点击版本信息下方的 LEARN 便签
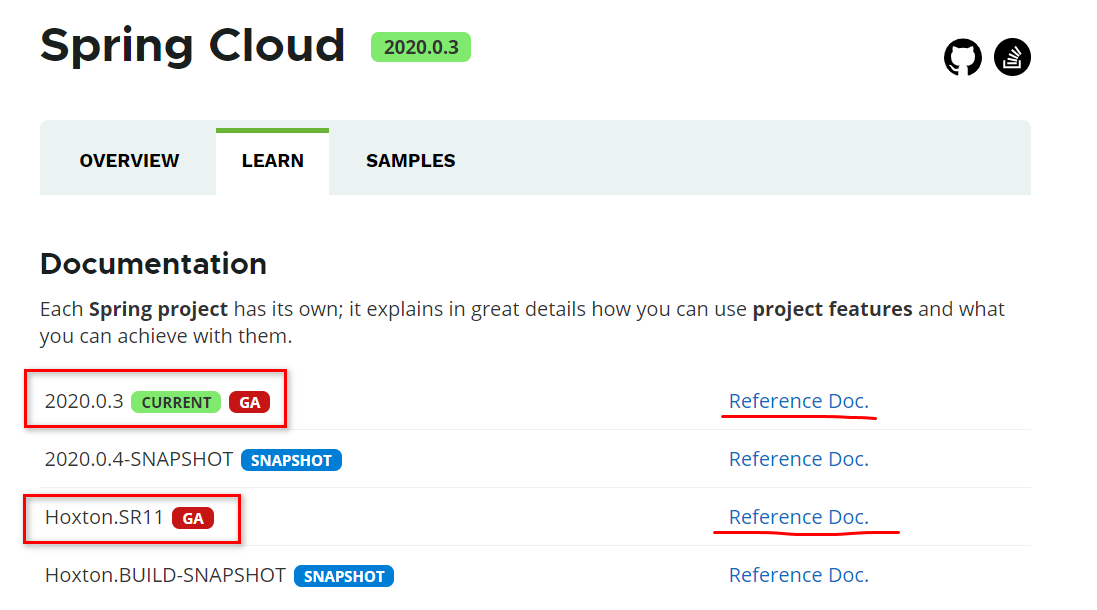
优先选择 GA (General Availability) 正式发布的版本。
考虑到新版本可能会遇到各种问题,自身技术水平有限,网上遇到同样问题的情况也相对较少,还是割舍掉 尝鲜 的念头,老老实实地选择第二梯队地版本。
点击 Hoxton.SR11 右侧的 Reference Doc,即可看到官方推荐的搭配版本
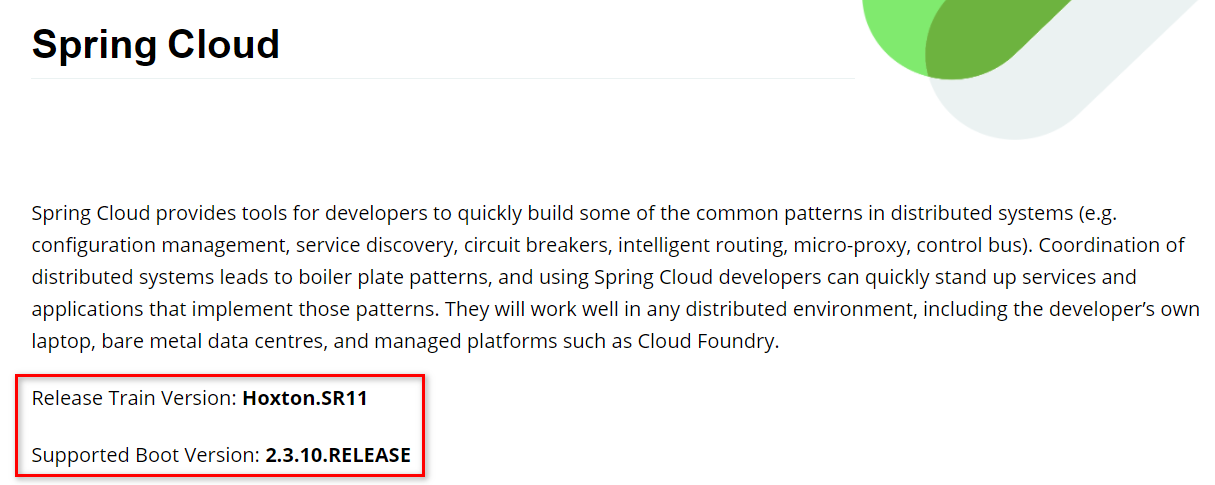
不爱折腾新版本的话,安装官方推荐的版本搭建项目框架就行了。版本可以后续再升级。
详细版本对应查看
https://start.spring.io/actuator/info
{
    "git":{
        "branch":"32297d783343977ca471232557985127bca14d6a",
        "commit":{
            "id":"32297d7",
            "time":"2021-06-23T08:59:54Z"
        }
    },
    "build":{
        "version":"0.0.1-SNAPSHOT",
        "artifact":"start-site",
        "versions":{
            "spring-boot":"2.5.1",
            "initializr":"0.11.0-SNAPSHOT"
        },
        "name":"start.spring.io website",
        "time":"2021-06-23T14:34:16.970Z",
        "group":"io.spring.start"
    },
    "bom-ranges":{
        "azure":{
            "2.2.4":"Spring Boot >=2.2.0.RELEASE and <2.3.0.M1",
            "3.2.0":"Spring Boot >=2.3.0.M1 and <2.4.0-M1",
            "3.5.0":"Spring Boot >=2.4.0.M1 and <2.5.0-M1"
        },
        "codecentric-spring-boot-admin":{
            "2.2.4":"Spring Boot >=2.2.0.RELEASE and <2.3.0.M1",
            "2.3.1":"Spring Boot >=2.3.0.M1 and <2.5.0-M1"
        },
        "solace-spring-boot":{
            "1.0.0":"Spring Boot >=2.2.0.RELEASE and <2.3.0.M1",
            "1.1.0":"Spring Boot >=2.3.0.M1 and <2.6.0-M1"
        },
        "solace-spring-cloud":{
            "1.0.0":"Spring Boot >=2.2.0.RELEASE and <2.3.0.M1",
            "1.1.1":"Spring Boot >=2.3.0.M1 and <2.4.0-M1",
            "2.1.0":"Spring Boot >=2.4.0.M1 and <2.6.0-M1"
        },
        "spring-cloud":{
            "Hoxton.SR11":"Spring Boot >=2.2.0.RELEASE and <2.3.999.BUILD-SNAPSHOT",
            "Hoxton.BUILD-SNAPSHOT":"Spring Boot >=2.3.999.BUILD-SNAPSHOT and <2.4.0.M1",
            "2020.0.0-M3":"Spring Boot >=2.4.0.M1 and <=2.4.0.M1",
            "2020.0.0-M4":"Spring Boot >=2.4.0.M2 and <=2.4.0-M3",
            "2020.0.0":"Spring Boot >=2.4.0.M4 and <=2.4.0",
            "2020.0.3":"Spring Boot >=2.4.1 and <2.5.3-SNAPSHOT",
            "2020.0.4-SNAPSHOT":"Spring Boot >=2.5.3-SNAPSHOT"
        },
        "spring-cloud-alibaba":{
            "2.2.1.RELEASE":"Spring Boot >=2.2.0.RELEASE and <2.3.0.M1"
        },
        "spring-cloud-gcp":{
            "2.0.3":"Spring Boot >=2.4.0-M1 and <2.5.0-M1"
        },
        "spring-cloud-services":{
            "2.2.6.RELEASE":"Spring Boot >=2.2.0.RELEASE and <2.3.0.RELEASE",
            "2.3.0.RELEASE":"Spring Boot >=2.3.0.RELEASE and <2.4.0-M1",
            "2.4.1":"Spring Boot >=2.4.0-M1 and <2.5.0-M1"
        },
        "spring-geode":{
            "1.2.12.RELEASE":"Spring Boot >=2.2.0.RELEASE and <2.3.0.M1",
            "1.3.12.RELEASE":"Spring Boot >=2.3.0.M1 and <2.4.0-M1",
            "1.4.7":"Spring Boot >=2.4.0-M1 and <2.5.0-M1",
            "1.5.1":"Spring Boot >=2.5.0-M1"
        },
        "vaadin":{
            "14.6.4":"Spring Boot >=2.1.0.RELEASE and <2.6.0-M1"
        },
        "wavefront":{
            "2.0.2":"Spring Boot >=2.1.0.RELEASE and <2.4.0-M1",
            "2.1.1":"Spring Boot >=2.4.0-M1 and <2.5.0-M1",
            "2.2.0":"Spring Boot >=2.5.0-M1"
        }
    },
    "dependency-ranges":{
        "native":{
            "0.9.0":"Spring Boot >=2.4.3 and <2.4.4",
            "0.9.1":"Spring Boot >=2.4.4 and <2.4.5",
            "0.9.2":"Spring Boot >=2.4.5 and <2.5.0-M1",
            "0.10.0":"Spring Boot >=2.5.0-M1 and <2.5.2-M1",
            "0.10.1-SNAPSHOT":"Spring Boot >=2.5.2-M1 and <2.6.0-M1"
        },
        "okta":{
            "1.4.0":"Spring Boot >=2.2.0.RELEASE and <2.4.0-M1",
            "1.5.1":"Spring Boot >=2.4.0-M1 and <2.4.1",
            "2.0.1":"Spring Boot >=2.4.1 and <2.5.0-M1",
            "2.1.0":"Spring Boot >=2.5.0-M1 and <2.6.0-M1"
        },
        "mybatis":{
            "2.1.4":"Spring Boot >=2.1.0.RELEASE and <2.5.0-M1",
            "2.2.0":"Spring Boot >=2.5.0-M1"
        },
        "camel":{
            "3.3.0":"Spring Boot >=2.2.0.RELEASE and <2.3.0.M1",
            "3.5.0":"Spring Boot >=2.3.0.M1 and <2.4.0-M1",
            "3.10.0":"Spring Boot >=2.4.0.M1 and <2.5.0-M1"
        },
        "open-service-broker":{
            "3.1.1.RELEASE":"Spring Boot >=2.2.0.RELEASE and <2.3.0.M1",
            "3.2.0":"Spring Boot >=2.3.0.M1 and <2.4.0-M1",
            "3.3.0":"Spring Boot >=2.4.0-M1 and <2.5.0-M1"
        }
    }
}
父工程 pom.xml 引入依赖
<!-- spring cloud Hoxton -->
<dependency>
    <groupId>org.springframework.cloud</groupId>
    <artifactId>spring-cloud-dependencies</artifactId>
    <version>${springcloud.version}</version><!-- Hoxton.SR11 -->
    <type>pom</type>
    <scope>import</scope>
    <!--
                <scope>import</scope>
                解决单继承问题,通过import pom文件达到依赖的目的(典型的非继承模式),从而不用从父类中引用依赖
                -->
</dependency>
<!-- spring cloud alibaba -->
<dependency>
    <groupId>com.alibaba.cloud</groupId>
    <artifactId>spring-cloud-alibaba-dependencies</artifactId>
    <version>${springcloud-alibaba.version}</version><!-- 2.2.1.RELEASE -->
    <type>pom</type>
    <scope>import</scope>
</dependency>
在父工程下新建服务提供者和服务消费者两个模块
搭建两个 SpringBoot 项目
入门教程可以参考:https://www.bilibili.com/video/BV18E411x7eT
整合 Nacos
- Spring Cloud Alibaba:Nacos 作为注册中心和配置中心使用
- https://nacos.io/zh-cn/docs/quick-start.html
- https://github.com/alibaba/nacos
注意:
linux版的nacos默认是以集群的形式启动,要想启动单机,在bin目录执行下面命令即可
sh startup.sh -m standalone &防火墙开放端口
sudo firewall-cmd --zone=public --add-port=8848/tcp --permanent
sudo systemctl restart firewalld
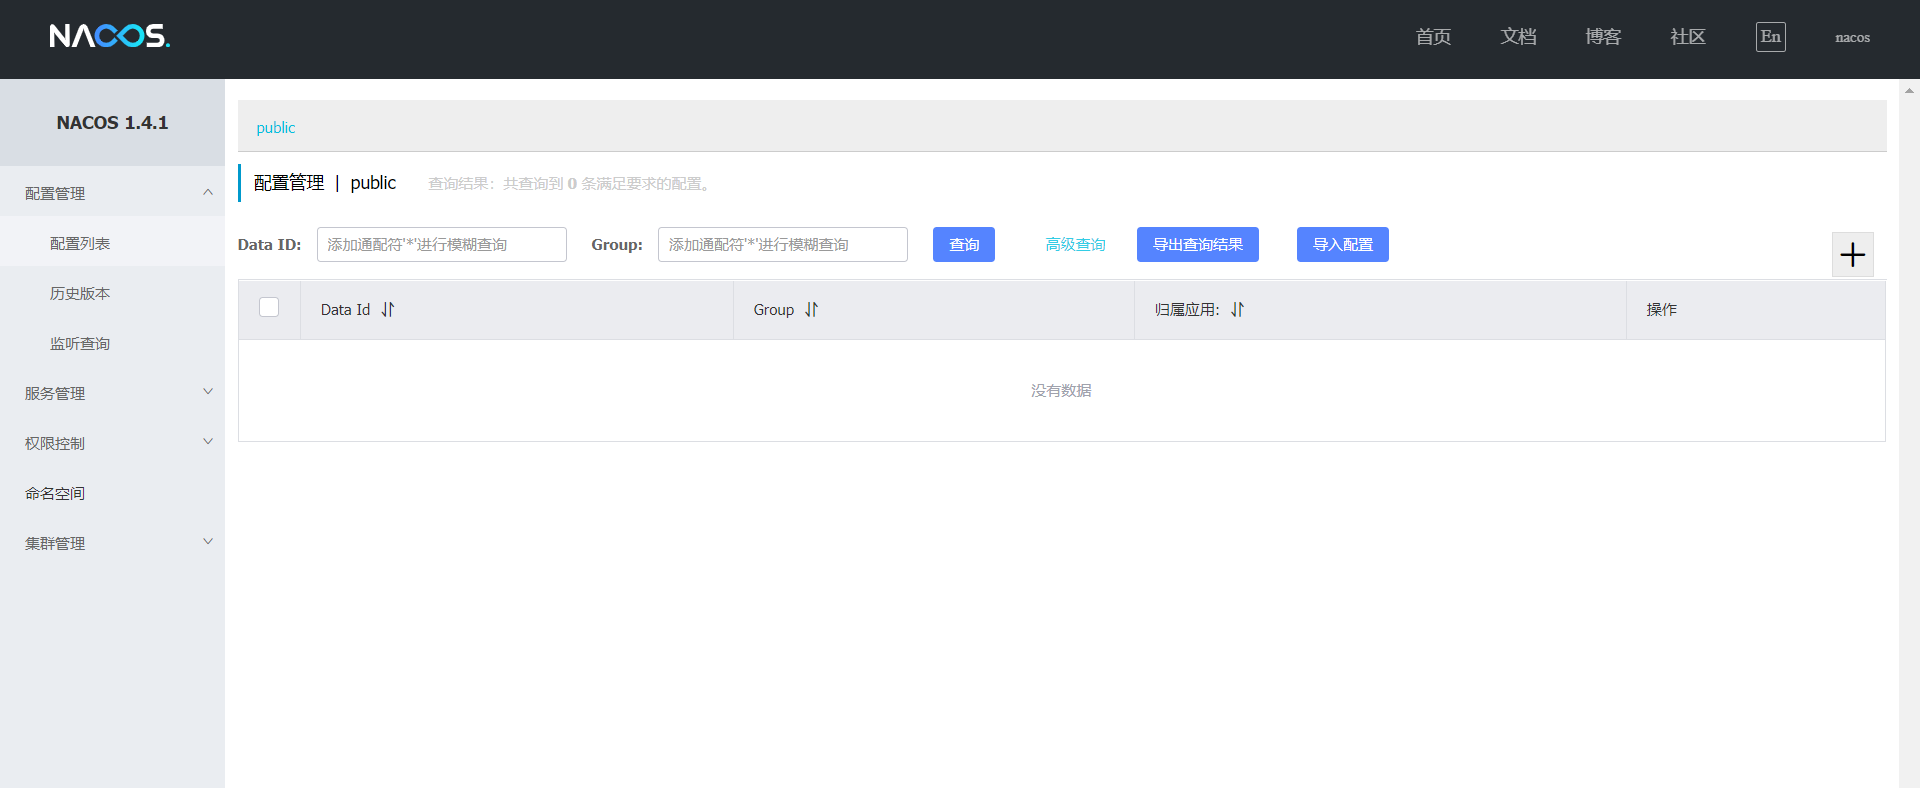
访问 http://192.168.137.151:8848/nacos
整合 Sentinel
- https://github.com/alibaba/Sentinel/releases
先从官方 GitHub 下载 Sentinel,建议选择跟项目依赖相同的版本。比如,项目中 Sentinel jar 包依赖版本是 1.7.1,选择 sentinel-dashboard-1.7.1.jar。
启动 sentinel,可以直接用 jar 包的方式启动,JVM参数,看运行情况后续再调整。
nohup java -server -Xms400m -Xmx400m -Xmn300m -Xss512K -XX:MetaspaceSize=128m -XX:MaxMetaspaceSize=128m -XX:PermSize=128m -XX:MaxPermSize=128m -XX:MaxDirectMemorySize=128m -XX:SurvivorRatio=3 -XX:TargetSurvivorRatio=90 -XX:+UseConcMarkSweepGC -XX:+UseParNewGC -XX:CMSFullGCsBeforeCompaction=5 -XX:+UseCMSCompactAtFullCollection -XX:+UseCMSInitiatingOccupancyOnly -XX:CMSInitiatingOccupancyFraction=70 -XX:+ExplicitGCInvokesConcurrent -XX:-OmitStackTraceInFastThrow -XX:+PrintCommandLineFlags -XX:+PrintGCDetails -XX:+PrintGCDateStamps -XX:+PrintGCTimeStamps -Xloggc:/home/web/logs/gc/sentinel/gc-%t.log -XX:+UseGCLogFileRotation -XX:NumberOfGCLogFiles=5 -XX:GCLogFileSize=20M -jar sentinel-dashboard-1.7.1.jar >logs/sentinel-dashboard-`date +%Y-%m-%d`.log 2>&1 &Sentinel 控制台默认运行在 8080 端口上,登录账号密码均为sentinel。
访问 http://192.168.137.151:8080
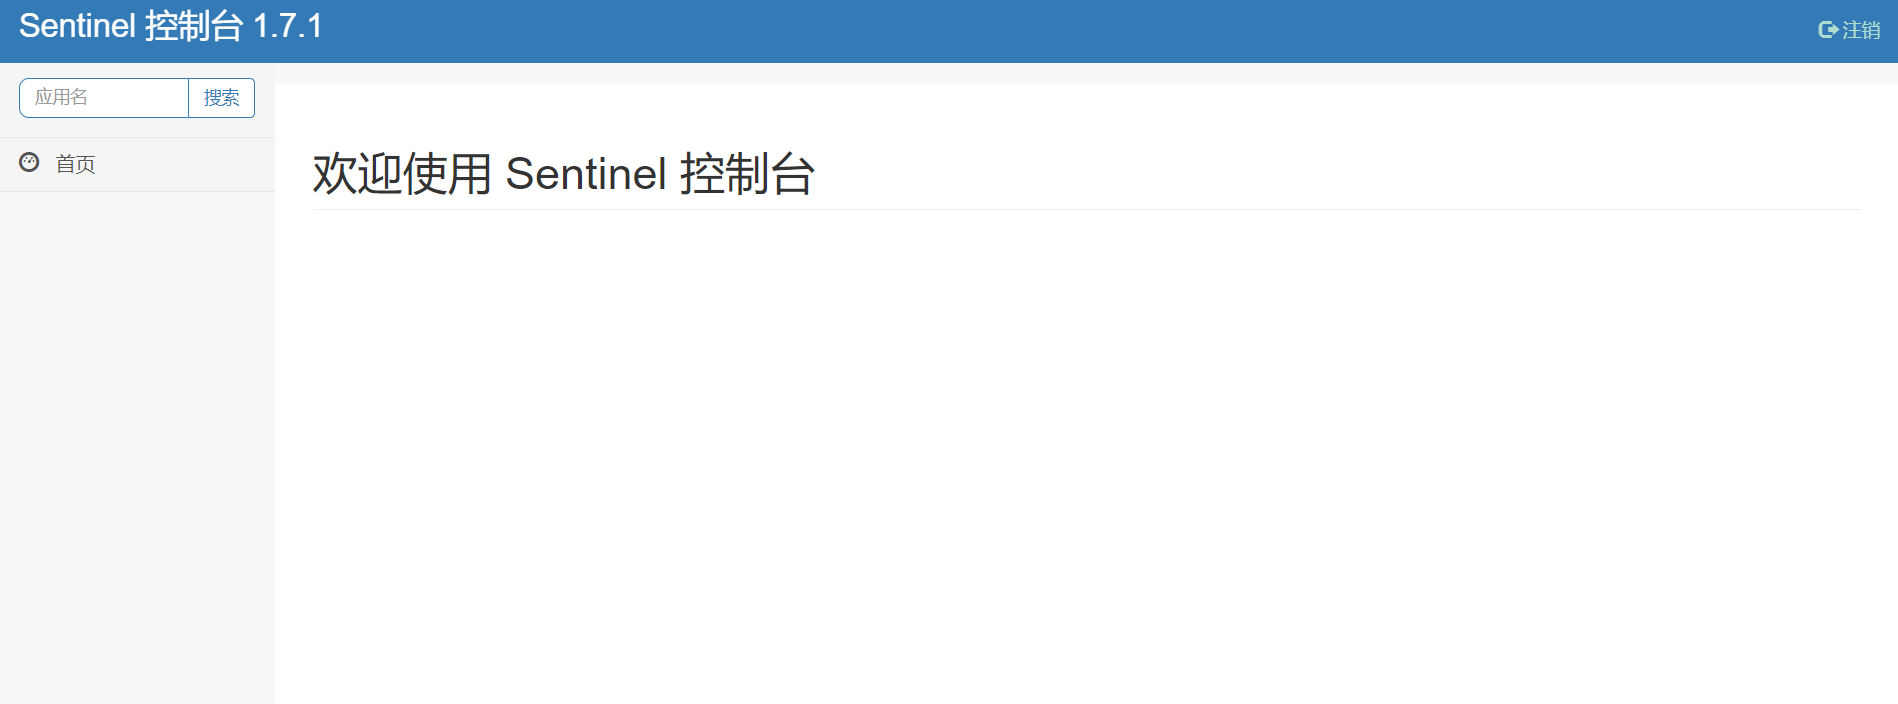
注意,sentinel 由于懒加载的原因,需要先访问项目服务之后,才能在控制台看到服务监控信息。
六、存在的缺陷和问题,及是否有应对措施?
七、后期维护升级的难度和成本
SpringCloud 组件升级
